
Learning how to make cooking videos brings your recipes to life and makes your readers feel like they’re right in your kitchen.
And you probably feel like your plate is already full between creating recipes and writing posts! 🍛 But trust me, learning how to make cooking videos is worth it. Online videos have an audience reach of over 92% among internet users worldwide.
This means TikTok, YouTube Shorts, and Instagram are hungry for video content, and so is your audience. So, stick around, and I’ll show you exactly how to make a cooking video. 🎥
I’ll walk you through how to plan your video and shoot the cooking process step by step. Then, you’ll learn how to turn it into a recipe video that’s good enough to taste. I’ll even show you how to easily add it to your blog — inside a recipe card!
1. Plan your cooking video

The first step is always planning.
Before you film your cooking video, you need to plan it out. This makes your content look more professional and prepared. Plus, it saves you from a lot of stress and last-minute changes.
So, here are a few tips to nail down your planning. ⬇️
Pick a recipe
Start with something easy and camera-friendly.
For example, a roasted veggie grain bowl is perfect if your readers love simple, colorful meals. See how it's full of photo-friendly features like gooey caramelized veggies and vibrant greens? 🥬

Map out your video
You don’t have to write down every word but have a clear idea of each step.
For the grain bowl, I'd plan to show steps like chopping veggies like sweet potatoes, kale, and so on. Then roasting the veggies, cooking the quinoa, and putting the bowl together.
You can use something as simple as the story map example below to keep yourself organized.

Think about your shots
Are you making cooking videos for YouTube? Or maybe you're making cooking videos for Instagram or TikTok? Will you record horizontally or vertically?
Decide on angles like overhead for prep or close-ups for textures.
For my bowl, I'll make sure to record the bright veggies being chopped, the sizzling tray coming out of the oven, and the steam rising from the freshly cooked quinoa. And remember, a well-lit kitchen is a must.
Get your kitchen ready
Clear the clutter and set the stage with props like a wooden cutting board or colorful bowls. I also recommend pre-measuring your ingredients to stay organized and save time.
It may feel like planning doesn’t count because you can’t show it off in the final video. But, it'll lead to a much better cooking video!
2. Get your gear for your videos ready
You don't need anything EXTREMELY new and expensive, especially if you're just starting out.
Let's get to the equipment I recommend.
Camera 📷
A must-have for shooting any kind of videos is a quality camera.
But wait. Does this mean you need to splurge on a top-of-the-line model? Absolutely not! A smartphone does the trick, too.

Then, when you're ready to upgrade or invest more, a DSLR or mirrorless camera will give you sharper quality. But, again, it's not essential for beginners.
Tripod
A tripod gives you steady shots and keeps your hands free to cook. Look for one with adjustable angles so you can switch easily between overhead and close-up shots.
If you’re using an iPhone, try shooting in action mode for extra stability. It’s like having a tripod in your pocket.
Lighting ⚡️
Just like a pinch of salt elevates the flavors in a dish, good video lighting can elevate your cooking video too.
So, set up near a window when filming during the day to take advantage of natural light. But if it's too gloomy or you're shooting at night, I suggest picking up a ring light or softbox.

With the right lighting, your food always looks its freshest, no matter the weather.
Microphone 🎤
If you’re talking in your videos, try using a small clip-on mic to make your voice clear.
Not talking? Focus on recording the sounds of sizzling, chopping, and mixing. People watch cooking videos to learn and for the ASMR vibes. 😉
Video editing software
Editing is where your cooking video really comes together.
I'm talking about cutting clips and adding effects like music and subtitles. If you're a beginner, start with easy tools like iMovie or CapCut. They’re free and simple to use.
Canva is another great option for editing short videos and adding text, especially if you already use it for blog graphics.
Want more advanced video editing tools? Adobe Premiere Pro or Final Cut Pro are great choices.

3. Prep your kitchen and ingredients for filming
Before you hit record, make sure your ingredients are camera-ready.
Get your ingredients in place AND it's also about presenting your ingredients in a way that's visually appealing to your audience.
Pre-measure and pre-cut
First things first: pre-measure and pre-cut your ingredients.
Chop, slice, and dice everything to save time during filming and keep people focused on your recipe.
Use clear bowls or jars to display ingredients like spices, grains, or colorful veggies. They add style and clarity to your shots.

Create a clean and clear space
A tidy kitchen is a happy kitchen!
Clear out clutter and wipe down counters so your background looks clean and professional. Lay out your ingredients in the order you’ll use them. This makes filming faster and more intuitive.
Placement is key — think visuals
Show off the colors and textures of your ingredients.
For example, place bright veggies like bell peppers or greens in bowls that make their colors pop. Add a little garnish, like fresh herbs or seeds, to make your dish look extra yummy. Use props like a wooden cutting board or colorful napkins to make your cooking video more interesting.
And here’s a quick tip: Keep a damp towel nearby to clean up spills so your shots stay neat and focused on your recipe!
4. Make your cooking video: Camera angles and shots
You've picked and prepped your recipe. And your equipment is ready.
Now it's time to whip up your recipe and make (shoot) your actual cooking video! So, let's dive into my top tips for understanding camera angles and shots.
Start with the basics: Camera angles
The angles you choose can make your food look even more delicious.
Here are some ideas for your first cooking video. ⬇️
Overhead shots
Use these to show your entire workspace or ingredients. For the roasted veggie grain bowl, an overhead shot is great for showing pre-chopped sweet potatoes, kale, and almonds.
Medium shots
Show yourself in action with the food. After all, your viewers want to see YOU.
This angle works well when adding roasted veggies to the quinoa or drizzling the tahini dressing. It adds a personal touch while keeping the focus on the process.
Close up shots
Zoom in on the details!
Close-ups are great for showing textures like the crispy edges of roasted veggies or a creamy drizzle of dressing. You might even get a close-up as you sprinkle seeds over the bowl.

Next, focus on the shots
The establishing shot is the first shot of your cooking video.
Start your video by showing your workspace to set the scene. For the roasted veggie grain bowl, I might show my clean counter with all the prepped ingredients laid out in bowls, ready to go.
The process shots highlight the key steps of your recipe. For example, chopping veggies, roasting them in the oven, and cooking the quinoa.
The final plating shot is that star moment: the finished dish!
For the grain bowl, I'd put it on a clean surface, drizzle the tahini, and sprinkle the seeds. I'd use an overhead or close-up shot to make the colors and textures stand out.
💡Remember, practice makes perfect.
The more you work with shots and angles, the better your videos will get. And, always film more than you think you’ll need. Extra footage gives you plenty of options when editing, so you don’t miss any important!
Beyond basics: Creative video techniques
Here are a few simple ideas to try, even though they go beyond just pressing “record.”
If you enjoy videography and have a little extra time, you’ll be mixing these techniques in no time! Especially since most can be done using basic camera settings.
- POV (Point of View): Bring your audience into the action! Strap on a camera to show your perspective — like chopping veggies or stirring a sauce.
- Time-lapse: Show a long process, like dough rising or veggies roasting, in just a few seconds. It’s an easy way to keep your video exciting and fast-paced.
- Slow motion: Highlight those exciting moments in slow-mo to really get mouths watering.
- BTS (Behind the Scenes): Share a quick peek at your setup — prepped ingredients, your lighting, or even a blooper that shows the real you.
- Three-point lighting: Use three lights to really make your food shine. A main light highlights the dish, a second light softens shadows, and a third adds depth for that polished, pro look.
5. Edit your cooking video

Good sound and clean, simple edits keep people watching your videos.
People want to hear every sizzle, chop, and stir. They also want to hear you explain your recipe process and any tips you might have. Editing is where your video comes together, and a little planning can make it easy.
Try out some of these quick tips for sound and editing. 📢
Sound quality tips
- Find a quiet space: Turn off fans, TVs, or anything noisy in the background.
- Use a mic: A clip-on mic works great for clear instructions, and your camera mic can pick up all those satisfying kitchen sounds.
- Do a quick check: Take a test clip to make sure your sound is clear before starting.
Editing tips for cooking videos
- Storyboard your video: Map out the main steps of your recipe to keep editing smooth and organized.
- Keep it tight: Trim out mistakes or long pauses so your video moves at a good pace.
- Add a little extra: Add text for steps and soft music to make it more accessible and fun to watch.
- Use transitions wisely: Stick to simple cuts or fades—too many effects can distract viewers.
- Let the food do the work: Your recipe is the star, so keep effects subtle and let the cooking process shine.
Don’t forget, video editing tools like CapCut, iMovie, or Canva make post-production easy.
I also recommend editing on your computer if you can. I don’t know about you, but editing on my phone ends up taking at least twice as long!
Want a more in-depth view of editing a cooking video? Check out the video below from Pinch of Yum's video creator:
6. Share your cooking videos
You didn't make these videos for no one to watch them!
So, now it's time to share them with your audience. I'll walk you through a few ways to share your cooking videos.
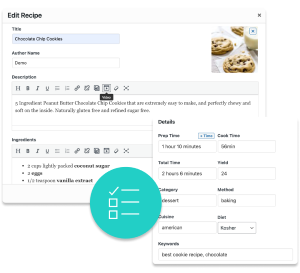
Add your cooking videos to your food blog with Tasty Recipes

With our WordPress recipe plugin, adding videos to your website is FUN and EASY.
Step by step videos make recipes easier to follow, helping your readers succeed in the kitchen. And, when your audience watches videos on your site, they’re more likely to stick around. Plus, YOU control how your video plays with options like autoplay, mute, loop, and hiding controls. ⏯️

Here's how simple adding a video is with the Tasty Recipes plugin:
- Download Tasty Recipes and add it to your site.
- Upload your video to YouTube, Vimeo, or another place you prefer.
- Copy the video link.
- Open your recipe card in Tasty Recipes and paste the link into the “Video” field.
- Save and publish. Your video is now part of your recipe card!
Want to learn more about adding recipe videos or how to add videos to your recipe card? These guides break it all down step by step.
Upload a YouTube cooking video

If you want to make cooking videos for YouTube, start a channel that reflects your brand with a consistent name, logo, and style.
Upload your videos with clear titles and descriptions, using keywords your audience might search for (like “quick roasted veggie grain bowl recipe”) to help them find your cooking content. And don’t forget to link back to your blog in the video description. 🔗 It’s an easy way to get more people over to your site.
Share your videos to TikTok, YouTube Shorts, or Instagram
Short form content is king (or queen!) on channels like Instagram, TikTok, and YouTube Shorts. But, these short videos can help you connect with a long list of people. 📋
For example, quick recipe demos, satisfying shots of sizzling pans or sauce drizzles, and even a peek behind the scenes in your kitchen.
Quick, creative clips can grow your audience and bring more traffic to your blog. But don’t expect it to happen overnight. Platforms like these are made to keep people scrolling, so it may take time to build a loyal following who clicks over to your site.
But, the good news is, the ones who do will be oh-so sweet.
7. Tips to make a cooking video even better
Once you’ve got a few videos under your belt, you might catch the creative bug!
Suddenly, you’ll be thinking of new angles to try, fun editing tricks, and little tweaks to make your videos even better. Over time, you’ll also feel more confident in front of the camera AND behind it. But, here are a few extra tips to keep you moving forward. 🦶🏻
- Listen to your audience: Your viewers are your best critics. Pay attention to their comments and use constructive feedback to make each video better than the last.
- Try new things: Test with different angles, add music, or test out voiceovers. You might find that showing your face or speeding up certain clips keeps viewers more engaged.
- Team up with other food bloggers: Collab on a recipe video or exchange tips. It’s a great way to grow your audience, connect with the community, and have fun!
- Focus on quality over quantity: It’s better to post one polished video than several rushed, sloppy ones. Take your time planning, filming, and editing to create something you AND your audience will love.
And most importantly, keep at it! Every video is a chance to learn and grow. 📈
Interested in trying Tasty Recipes?
With our easy-to-use, customizable recipe card plugin, Tasty Recipes helps you look good — and your recipes look even better.
Take a look at all Tasty Recipes has to offer.
Also, don’t forget about our 14-day money-back guarantee! Trying Tasty Recipes is risk-free!
Go make a cooking video for your website or social media channel
You’re all set. Now it's up to you to put what you've learned in this post to action. 👨🏻🍳
Whether you’re sharing on YouTube, TikTok, Instagram, or your blog, every video is a chance to bring your recipes to life and connect with more people.
And don’t forget, your food blog is the perfect home for your videos. Use a WordPress recipe plugin like Tasty Recipes to add beautiful recipe cards to your WordPress posts — complete with your step-by-step cooking videos!
So, grab your camera, have fun in the kitchen, and share those cooking videos. Your audience is going to love what you create! 🎥🍴