When it comes to Search Engine Optimization (SEO) for your blog, you know how it goes. Keywords, meta descriptions, catchy titles… the whole shebang. 💥 But here's the thing — you need to optimize blog images for SEO, too.
Whether you're a food blogger, travel enthusiast, or DIY influencer, visuals play a huge role in your blog.
And here's the harsh truth: unoptimized images (no matter how pretty or helpful they are) slow down your site and hurt your search engine rankings.
So, how do you make sure your images are working for you, not against you?
I'm diving into that today! I'll cover what you need to know about image optimization for SEO, from choosing file formats to adding alt text.
Why you need to optimize blog images
Images are the spice that makes your blog posts pop! They grab attention, break up walls of text, and help tell your story.
Plus, they add a touch of personality and social proof. What's that catchy phrase, “Pics or it didn't happen?” 😜 But, all jokes aside, images make readers feel more connected to you and your content.
💡 Remember, those images need to look good without hurting your site's page speeds.
Here's why SEO image optimization matters:
- A speedy WordPress site with responsive images keeps readers and Google happy
- Anyone can access your images, including people using screen readers
- Images can help you rank higher in image search results, bringing in even more traffic to your blog
Don't worry, though. I won't get too technical. I'll break it down in a way that's easy to understand. No coding needed.
Ready to optimize images for the web the easy way? Let's get started!
How to easily optimize blog images for SEO

Familiar with optimizing your blog posts, landing pages, and other web pages' content for SEO? Great! Then, it'll be pretty easy for you to optimize blog images.
If not, don't worry. I'll take you through the steps! You can also check out my helpful guide on SEO for food bloggers if you want to optimize your food blog content.
Anyway, here are the steps!
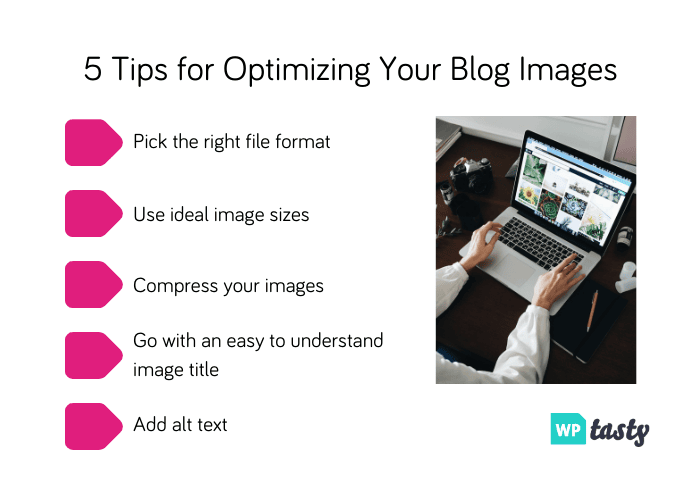
- Pick the right file format
- Use ideal image sizes
- Compress your images
- Go with an easy-to-understand image title
- Add ALT text
1. Pick the right file format
Before those photos hit your blog, you need to choose a file format.
This might seem like a tiny step, but choosing the right format makes a big difference in how quickly your images load.
Here's a breakdown of the most common image formats and when to use them:
- JPEG: This is the most popular format. It works for most images, from simple screenshots to images with lots of colors. You have to be conscious when compressing these images, though (more on that later).
- PNG: This format is ideal for high-resolution images with sharp lines or transparent backgrounds, like logos or graphics. PNGs tend to be a bit bigger in file size than JPEGs, so use them sparingly.
- GIF: This format is best for simple animations or images with limited colors. GIFs are generally larger file sizes, and when you compress them, you lose image quality.
Most of the images in WP Tasty's blog post are PNG files. I prefer the higher resolution, but I also compress them before uploading them to the site.
For most blog images, your best bets are JPEG or a compressed PNG. They're both a good balance of quality and file size, which is crucial for a fast-loading website.

Interested in Tasty Pins?
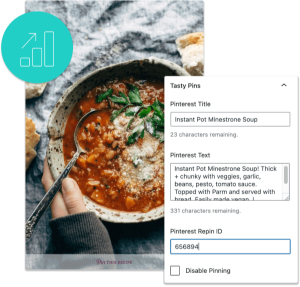
Make Pinterest easy with Tasty Pins! Automatically optimize your blog images for Pinterest and control your pin titles and descriptions for more clicks.
Don’t forget about our 14-day money-back guarantee! Trying out Tasty Pins is risk-free!
2. Use ideal image sizes
If your images are too big, they'll take up unnecessary space on your website and slow down loading times. But if they're too small, they'll look blurry and pixelated.
So, how do you find the size that's just right for optimized blog images? Here's a quick guide:
- Know your dimensions: The ideal image size depends on where you're using it on your blog. For example, a featured image might need to be larger than an image you use within a blog post.
- Check your theme: Your WordPress theme will usually have recommended image dimensions for different areas of your site. Check your theme's documentation or contact the theme developer if you're unsure.
- Use an image editing tool: You can easily resize your images using a tool like Photoshop, Canva, or ILoveIMG.
- Go for responsive design: Make sure your images look good on all screen sizes. Optimize images for the web, tablets, and smartphones.
Ultimately, the perfect image size depends on your blog's design and the specific image you're using. But most ideally, they load quickly and look their best on any device.
Below is a chart of the sizes I usually stick to when I optimize blog images for SEO. It might be a good starting point for you too!
| Image type | Dimensions | Notes |
|---|---|---|
| Blog post | 750px wide (height varies, but is kept under 500px) | Good for most images within your blog posts |
| Featured image | 800 x 420px | A common size for featured images, but check your theme's recommendations |
| Thumbnail image | 400 x 400px | Used in blog post previews, so keep them small for faster loading |
Now that your images are the right size, let's give them names that Google will love!
3. Compress your images
Compressing your images gives them a speedy boost. 🚀 If you do it right, your images will still look their best. Plus, you'll reduce their file size so they don't slow down your site.
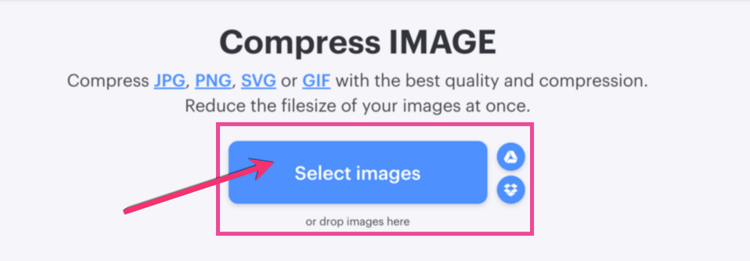
There are a few different ways to compress large images, but the easiest and most effective way is to use a WordPress plugin like Smush or an online tool like ILoveIMG.
Smush automatically makes your images smaller when you upload them, so you don't have to do it yourself. You can also resize images with Smush.
I compress and resize all of my images with ILoveIMG.

You just go to their site, upload the image you want to compress, and hit compress.
Voila! Your image will now have a smaller file size.
💭 Did you know that you can now choose your image file size when you download from Canva?

But be careful. Sometimes the file sizes can still be a bit large, so double-check them before uploading!
Here's another Tasty Tip: Don't make your images too small! If you compress them too much, they'll start to look blurry. Find the right balance where they still look good but load quickly.
Now, let's keep making your images smaller and faster! On to the next step: resizing.
4. Go with an easy-to-understand image title
Your image file names are clues for Google.
Instead of using generic names like “IMG_1234.jpg,” give your images descriptive names that tell Google (and your readers!) what they're about.
For example, in this article, I didn't use “IMG_1234.png.” Instead, I used names that matched my images. And, I used hyphens to separate the image titles. As you can see in, “canva-image-file-resizer” and “optimize-blog-images-tips.”

This helps Google understand the content of your image, and makes it easier for people to find your images in Google image search results.
Plus, let's be real. It's also easier for you when it comes to finding and organizing photos.
By taking a few extra seconds to name your image files, you optimize blog images and make your content more accessible to everyone.
5. Add ALT text
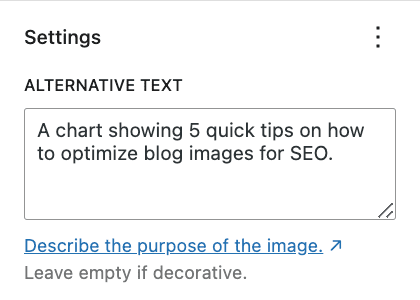
Alternative text, or alt text for short, is a brief description of the image, and the image alone.
This is the text that's read whenever someone who is visually impaired is using a screen reader on your site, so you want to think about how you can paint that image for them.
Here's an example from the first image in the post — the 5 tips to optimize blog images graphic. You'll see that I'm going with alt text that specifically indicates what the photo is. Nothing more, nothing less.

You don't want to describe all of your steps here and use it as a means of promoting your post. Just think about what's in the image itself and let that guide you!
The best tools to optimize blog images for SEO
Want to optimize blog images without the hassle?
There are image optimization tools out there that can help you make your images smaller and faster, all without having to learn any complicated code!
Here are a few of my favorite image optimization tools 🛠️
| Image optimization tool | Type | Best for |
|---|---|---|
| Smush | WordPress plugin | Bloggers who want to automatically compress & resize images when they upload them. |
| TinyPNG | Online tool | Quickly shrinking individual images or small batches of images. |
| ILoveIMG | Online tool | Compressing multiple images at once or doing other image editing tasks like resizing or converting formats. |
| Canva | Online design tool | Creating and optimizing images all in one place. |
| Tasty Pins | WordPress Pinterest plugin | Making sure your blog images look their best on Pinterest. |
The best SEO image optimization tool for you depends on your needs and how you like to work. Most of them are free, so try out a few to find your perfect match!
Optimize blog images for Pinterest too
Pinterest is all about visuals, so making sure your images look their best is key.
But optimizing images for Pinterest can be a bit tricky. Different Pinterest image sizes, descriptions, and all that jazz. It can get overwhelming!
That's where a WordPress Pinterest plugin like Tasty Pins comes in handy. It lets you optimize blog images specifically for Pinterest, right from your WordPress dashboard.
Just watch how easy it is! 👀
Tasty Pins make sure your images look amazing and helps you expand your reach to another social channel!
If you’ve been wanting to optimize your images for SEO on Pinterest, Tasty Pins makes it easy! Grab all Tasty Pins today for $49 for your first year.
Also, don’t forget about our 14-day money-back guarantee! Trying Tasty Pins is risk-free, and I think you’ll really like it!
Go optimize your blog images
There you have it! I've laid out how to make how to optimize blog images for SEO.
You know exactly which tools to use for better SEO image optimization. So time to get started! Make your images smaller and faster, so your website loads quickly and looks great.
Remember, happy readers and a happy Google mean more people will find and enjoy your awesome blog posts.
So, go ahead and give those images a little makeover! Your website will thank you!
Want to learn blog and image optimization? Head to the WP Tasty blog for food photography tips and other helpful guides.


