
Ever wonder why some Pinterest posts get so popular? It's all about Pinterest repins!
Getting more repins on them means more people see, love, and share your content. But why is this important?
Well, Pinterest takes pin popularity into account when determining what to show for searches. Plus, it's a way to drive more traffic to your site!
That's right. Pinterest is a fantastic source of traffic for bloggers of all types. Many bloggers say that Pinterest is one of their top sources of traffic. So, how do you get in on these perks? I've got you covered!
In this article, I'll cover:
So, are you ready to get your pins in the spotlight? Read on!
What is a repin on Pinterest?
A Pinterest repin is when you find content on Pinterest, like a delicious recipe or a clever decorating tip, and you save (aka repost) it to one of your own boards.
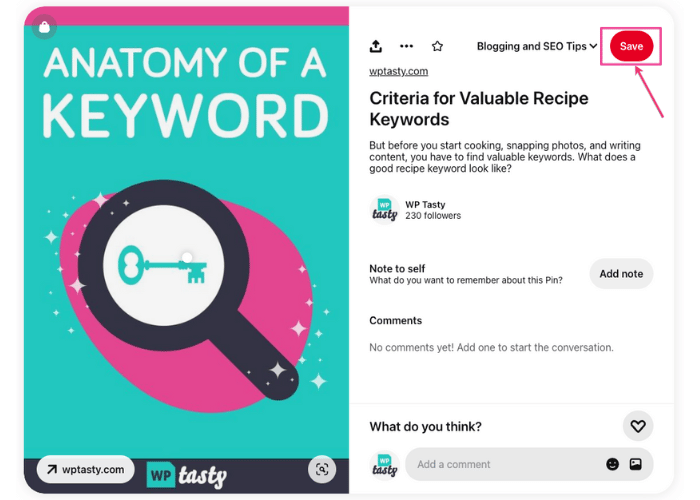
It's as easy as this: a repin = a save. And doing it is just as easy! When you come across a pin you want to repin, just click it, choose a relevant board to repin it to, and click Save.
The number of Pinterest repins a pin has is a good sign of its popularity. A pin with lots of repins has been clicked and saved more times than a pin with few repins.
This is exactly why repins are so important when it comes to growing your blog with Pinterest.
How do I know how many Pinterest repins a pin has?
Great question!
You can dive into stats with Pinterest Analytics and Google Analytics.
To keep things simple, I'll explain how to check on your pins using Pinterest Analytics.
- Log in to your Pinterest account.
- Go to Analytics → Overview
- Choose your date range, content type, and pin format.
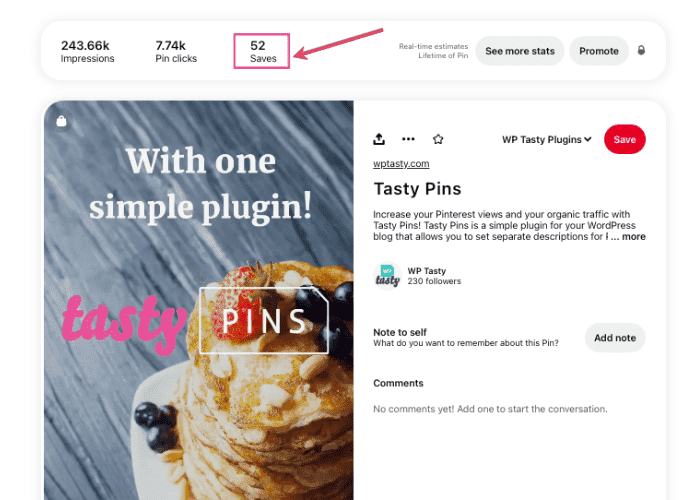
- From here, you can choose what stats you want to see. You can choose between stats like Saves, Clicks, Impressions, etc.
- For saves, go to the dropdown menus under Performance over time and Top Pins and click Saves.
You can also click on the specific Pinterest pin you want to know about. On the desktop, it shows the Saves above the pin. On mobile, it shows the stats of the pin below it.
Keep in mind: This is for checking your account's pins, not another user's pins.
Why are repins important on Pinterest?
Repins are used by Pinterest's algorithm to determine which pins are popular.
Pins that are more popular are more likely to appear in search results. For example, in a search for chicken enchiladas, the top 3 pins (excluding sponsored Pins) have:
- 49,000 repins
- 162,000 repins
- 35,000 repins
Seeing these numbers, it's clear that repins are used to place pins near the top of search results.
So, if you're trying to get your pin to show up for a certain keyword, it's important to increase the number of repins your pins have.
But remember, repins aren't all that goes into ranking your pins in the search results. Relevancy, trends, number of clicks, and more are also important to your Pinterest marketing strategy.
How do I get more repins for my images and posts?
Most repins come straight from Pinterest.
Chances are someone came across your profile, pin, or board because it matches what they're looking for. If your image, title, and description are helpful and inviting, you're on your way to getting more saves on Pinterest.
But what about when people repin content to Pinterest directly from your site?
Well, the good news is Pinterest is pretty smart and usually knows it's the same image from your site. But sometimes, it gets a bit confused, especially if the same picture shows up more than once on your page.
But don't worry! There are things you can do to your images to avoid this confusion:
- Set the data-pin-id: This is like giving your image a special tag. When people pin it from your site, it joins forces with your main pin on Pinterest.
- Limit your pinnable images: Think of this as putting up the best posters in your room. You pick a few favorites so your friends know exactly what you love. This way, when people visit your site, they pin the images you want to be seen the most.
Now, there are ways to do this with code. But, honestly, who has time for that? Not us! That's why I suggest a WordPress Pinterest plugin like Tasty Pins. So you can take care of this without the coding!
Let me show you why Tasty Pins is one of the best WordPress Pinterest plugins.
Add the Pin ID to your image
Once you've downloaded and installed the plugin, find the pin you want to link to.
If you aren't sure where to go from here, use your analytics to help you choose what pin to link. Remember to use tools like Pinterest Analytics, Google Analytics, and Tailwind to help. Go with the pins that already get tons of love!
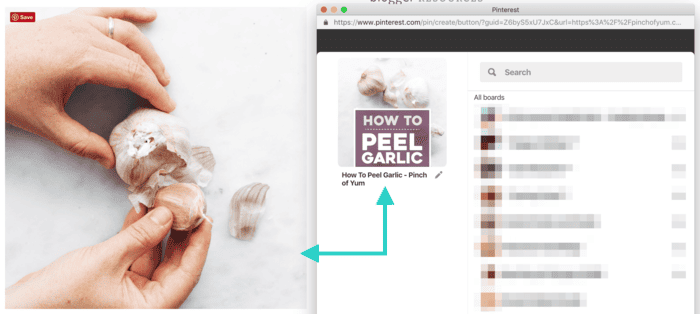
When you know which pin you want to link the images to, you can use that pin's ID for any of the images on your page.
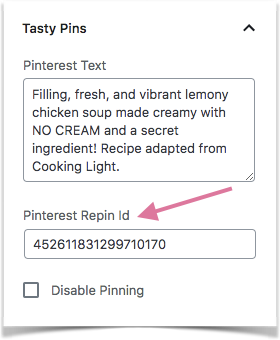
Click your pin and take a look at the URL for the page. Copy the long string of numbers at the end of the URL. This is the pin's unique ID.
Now go to your WordPress editor and select the image that you want to add the Repin ID to. Paste the Pinterest Repin ID in the Tasty Pins Pinterest Repin ID field.
Now, when this image is pinned with the Pinterest hover button, its save is attributed to the original Pin.
A quick tip: Adding a Repin ID to a forced image in Tasty Pins adds that Repin ID to all the other images in the content!
If you don't want to use the Repin ID, the next best option is to limit the options for images to save to Pinterest.
Limit image options for saving to Pinterest
There are two ways to limit the image options for saving to Pinterest:
- Disabling pinning on non-ideal images
- Force-pinning Pinterest-perfect images
Disabling Pinning
The manual way to limit the image options for saving to Pinterest is with the data-pin-nopin attribute.
This stops the image from being shown in the Pinterest multi-select tool (for example, with the browser button). It also stops any Pinterest hover buttons from showing up over the image.
You can add this attribute manually to any image. Or, you can use Tasty Pins to add it automatically with just the tick of a checkbox. It really is that simple. Just look at the image below.

This is a good option for any images that aren't great for Pinterest.
These might be process shots or ingredient shots if your website is a food blog. If you're in another niche, like crafts and fashion design, then a non-optimal image might be a materials shot or a metrics shot.
Both are really important for their audiences, but they won't do much good for Pinterest aesthetics.
Force-pinning a Pinterest-perfect image
When you force-pin an image, you force the user to use a specific image when saving to Pinterest regardless of which image they clicked the hover button on.
That means that the user can click the hover button on an image that isn't Pinterest-perfect, but instead, your chosen image that's best for Pinterest is used.
Pinterest repin strategies and tips
Repinning the right content is like picking the perfect ingredients for a recipe.
You need a mix that appeals to your audience and complements your blog's theme. So, focus on quality. Look for pins with clear, attractive images and descriptive, engaging text.
And don't forget, relevance is key. Choose pins that align with your audience's interests and your blog's niche.
Your content is your masterpiece, and repinning it is a way to showcase it to new Pinterest users. Now, there are best practices for going about this! Don't just go posting your top pin and top article with the same title and description every day.
That's a big no-no. And you don't want to get flagged as spam.
When it comes to repinning your own content:
- Mix older and newer posts to keep your content fresh and varied.
- Space out when you repin your content.
- Take trends and seasons into account.
- Stay active! It's important to regularly engage with others to stay authentic and transparent.
Discover Our Top 5 Tips for Optimizing your Pinterest Account
Sign UpFresh pins for the win!
I often get asked, “Can you post the same pins on Pinterest?”
After speaking with Kate Ahl from Simple Pin Media about this, I discovered that Pinterest has been shifting gears a bit to favor fresh pins (aka Pins being shared for the first time) in the home feed.
With that in mind, our recommendation now is to wait a little while before adding a Repin ID if it's a new piece of content. That way, Pinterest gets a chance to pass it around the Pinterest sphere and give your pin some extra juice.
That doesn't mean you should forget about your existing pins, though. Go through your older pins to see which ones got good responses and make refreshed versions of them. Change up titles, descriptions, and images.
And don't forget to grab Tasty Pins to make all of that easier for you!
