
Don't worry if you're new to Pinterest or just need a refresher.
This step-by-step guide will show you how to promote your blog on Pinterest. From setting up a business account to creating eye-catching pins and using hashtags like a pro!
I’ll use some examples of food and food blogging in this blog. But the techniques I share can be used by anyone to increase blog traffic!
Let’s get started!
1. Set up a Pinterest business account

When it comes to using Pinterest for blogging, I highly suggest creating a business account.
Here are some reasons why:
- Rich Pins: These special pins spill the beans on your content, sharing details like ingredients, pricing, and availability. Users love 'em, and they boost click-through rates to your site.
- Analytics: Get ready for some sweet analytics! Pinterest's marketing analytics give info on your audience, engagement, and Pin performance. It's like having your own spy network guiding you to create content that hits the mark.
- Ads: Grab your marketing hat and dive into Pinterest ads. Create targeted product ads for specific demographics, interests, and behaviors. It's a superpower that expands your reach and drives traffic from Pinterest to your blog.
- Promoted Pins: Promote your blog on Pinterest with Promoted Pins. Boost their reach by paying to show them to more people. More views, clicks, and chances of getting loyal readers (and customers).
Discover Our Top 5 Tips for Optimizing your Pinterest Account
Sign Up2. Claim your website on Pinterest
Claiming your website is pretty simple, and it's a crucial step in the setup process!
Think of it as raising your hand and saying, “Hey Pinterest, this website is mine!” By claiming your website, you're letting Pinterest know you're the domain's boss.
And guess what? It comes with some sweet perks!
Any pins with your domain will be attributed to your Pinterest account. And that lets you add your URL to your profile, gives you access to Pinterest Analytics, and enables Rich Pins for your account.
To keep things simple, I'll guide you through the process of connecting Pinterest to WordPress (the go-to platform to create a food blog).
1. Start by clicking on your profile picture in the top right corner of Pinterest. Then, go to your Settings.
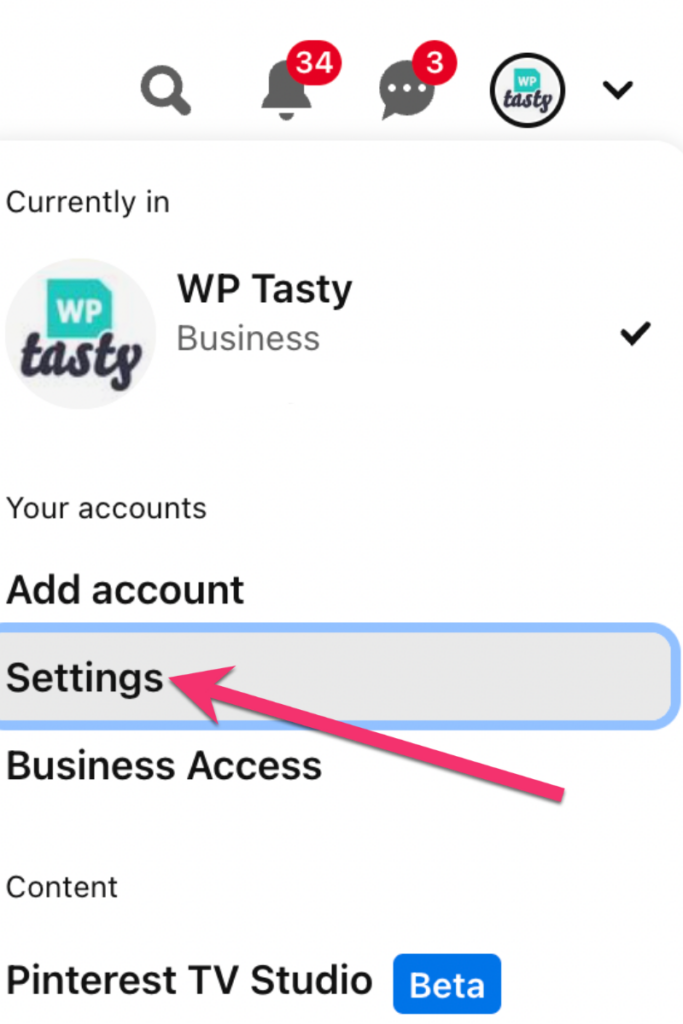
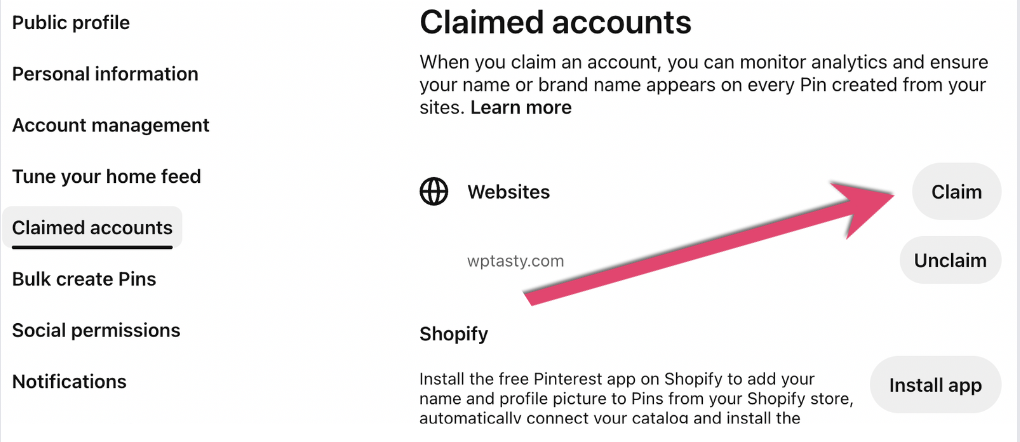
2. In the Settings menu, go to Claimed Accounts and click Claim. It's right across from Websites.
3. Copy the HTML tag on the left side of the window.
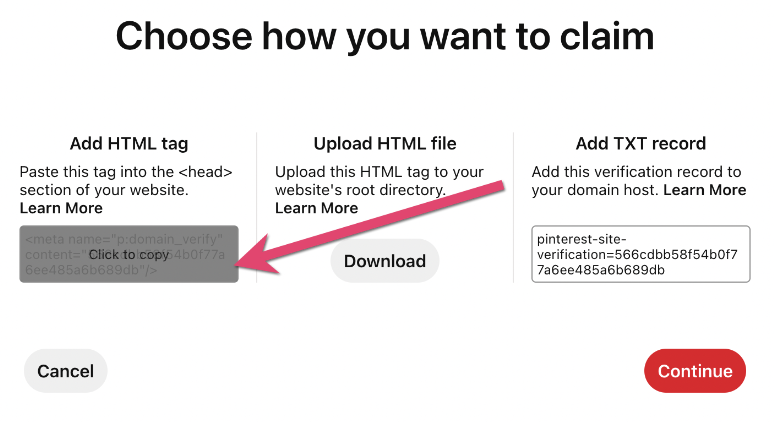
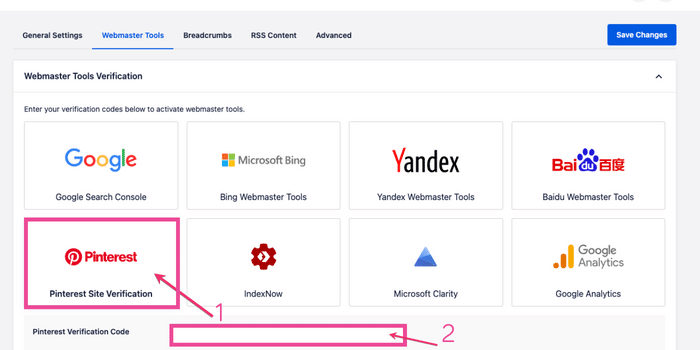
4. Paste your HTML tag into the AIOSEO settings on your WordPress blog.
5. After clicking on the HTML tag, click Continue.
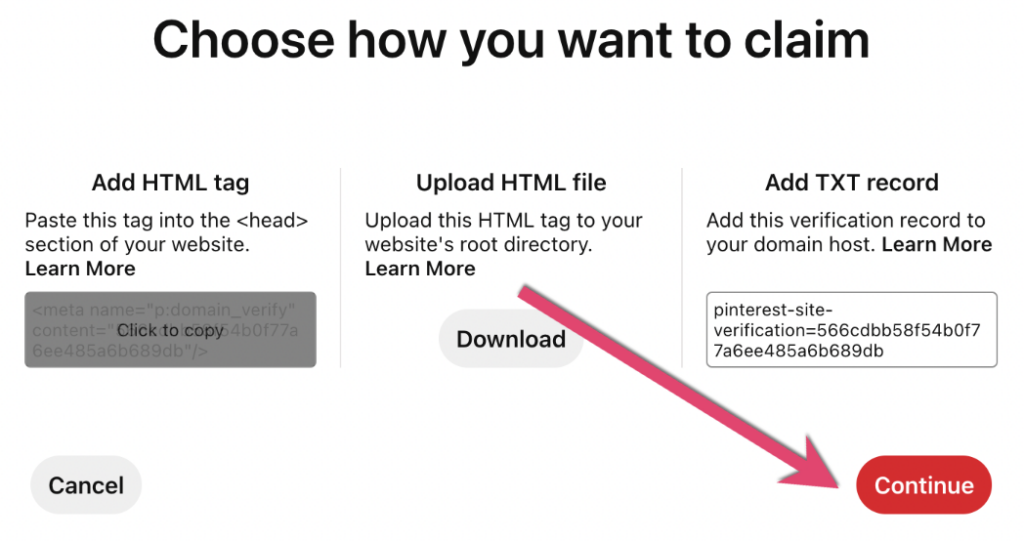
6. Enter your URL and click Verify.

Ta-da! You did it!
Your WordPress website is officially verified on Pinterest. Usually, it takes around 24-72 hours for Pinterest to complete the process.
Keep an eye on your inbox because they email you once your site is verified.
Pro Tip: If you have any issues after adding the verification code, try clearing your WordPress cache. And then you should be set!
3. Get Rich Pins
You no longer have to apply for Rich Pins. Once your account is set up and you’ve claimed your website, you can get Rich Pins!
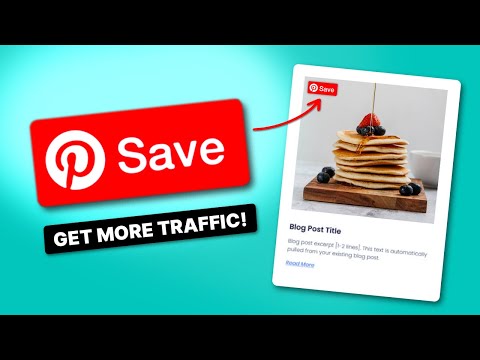
Rich Pins are different from regular Pins. They automatically pull info from your website to display on your Pins. This extra info makes it more likely that Pinterest users will click through to your blog and explore your content.
Three types of Rich Pins
- Article Rich Pins: Ever wonder, “How do I promote my Pinterest article?” To promote an article on Pinterest, you need Article Rich Pins. They're all about blog posts. These pins display the title, meta description, and author, making your content more enticing.
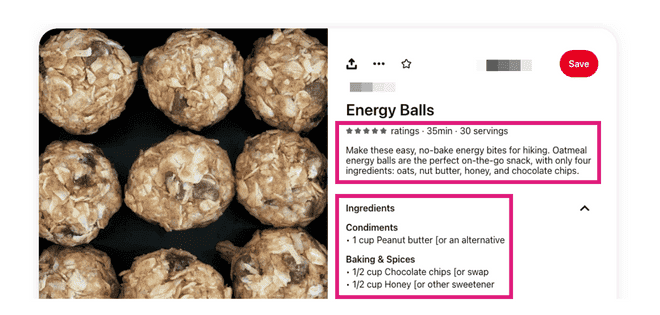
- Recipe Rich Pins: They showcase the title, service size, cook time, ratings, and a mouthwatering list of ingredients.
- Product Rich Pins: If you're all about selling products, these pins are your secret weapon. When linked to product pages, they automatically update with the latest pricing and availability info.
Getting Rich Pins the manual way is a headache. Messing with metadata code for every recipe is time-consuming and prone to errors.
But with Tasty Recipes, that hassle is gone! This WordPress recipe plugin takes care of everything for you.
Your recipes automatically become Recipe Rich Pins on Pinterest. No coding, no extra steps. Just those beautiful, informative pins driving traffic to your blog.
4. Optimize your Pinterest boards
Let's dive into the exciting part: creating Pinterest boards and pins!
Creating visual content is an important part of your Pinterest marketing strategy. The more click-worthy it is, the more visitors you get to your site.
1. Start with relevant boards ✔️
- Create around 10 boards that line up with your blog topics and audience.
- Stay within your niche to cater to your target audience's interests.
2. Pin and select cover images ✔️
- Pin 10-20 relevant pins to each board.
- Choose a different cover image each time you create a board.
3. Create a branded board ✔️
- Alongside topic boards, make sure to create a “branded board” that includes your blog name.
- For instance, “Most Popular BLOG NAME Posts” works well. Then, your audience quickly finds your blog content when they visit your Pinterest profile.
4. Add descriptions ✔️
- Descriptions add context for your audience and for Pinterest.
- These descriptions boost traffic, engagement, and reach, so it's worth the effort.
Remember, your Pinterest account should guide people to your content. So, unleash your creativity, create enticing boards, and let your profile shine!
5. Create click-worthy pins
I've put together a list of tips to help you create and optimize your pins, write descriptions and titles, make the most of hashtags, and strategically use keywords.
Putting these to practice will boost your Pinterest SEO, attract the right audience, and maximize your content's visibility in search results.
Images
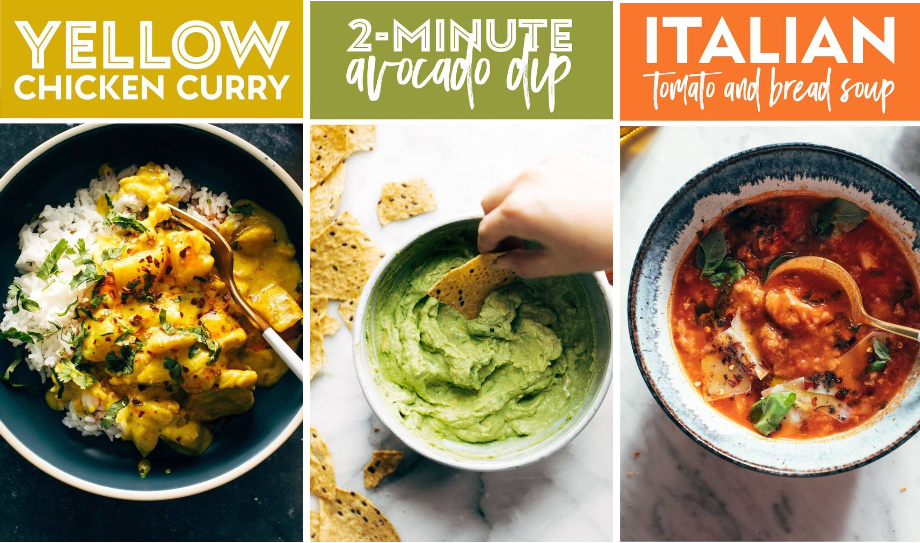
- Canva is the recommended tool for creating Pinterest pins that work on desktop and mobile devices. It's free, provides templates, and no graphic design skills are needed.
- Create 2-4 custom images per post (using different photos, fonts, and colors), to give your audience more options when pinning images.
- Remember to pin plain photos, too, as some users prefer them over images with text.
Before you start designing, be sure to check out best practices to give you some ideas for designing top-performing pins!
Descriptions and titles
- Descriptions still matter for Pinterest SEO, even though front-end users can't see them anymore.
- Pinterest descriptions help the algorithm determine relevance, ensuring users find what they type in Pinterest’s search bar.
- Titles play a vital role in encouraging clicks. Keep them within 100 characters.
Hashtags
- Yes, hashtags work on Pinterest! Use them when you create pins to organize content and make them more discoverable.
- Be specific with hashtags and use relevant terms.
- Stick to 3-4 hashtags so you don't come off as spammy.
Check out this post on Pinterest hashtags for more tips and tricks!

Keywords
- Keywords are crucial for Pinterest's search engine, just like in Google's.
- Use keywords in your profile, board titles and descriptions, pin titles and descriptions, image names, blog post meta descriptions, and alt text.
- Focus on using keywords specific to your audience and their search intent, staying within your niche.
By following these tips to use Pinterest to promote your blog for free, you'll optimize your Pinterest presence and attract the right audience to your content!
6. Create or join group boards
Collaborate with other creators by joining or creating group boards around your blog's niche.
These shared spaces expose your pins to a wider audience, creating engagement and more readers. The more people that see your Pins, the more people you can drive to your amazing blog posts!
To start, reach out to other Pinners or search other people's boards! Then, you can use the Join Board button or ask for an invite. Then, simply follow their guidelines and start pinning to that board. Others repin your content and it reaches a bigger audience.
7. Download the Tasty Pins plugin
Want to upgrade your digital marketing strategy for Pinterest?
Let me introduce you to a WordPress Pinterest plugin called Tasty Pins. It's made specifically to optimize your Pinterest presence and skyrocket your blog's visibility.
Here's how it helps you get that coveted traffic:
- SEO superpowers: Tasty Pins allows you to add hidden Pinterest-specific descriptions and alt text to your images, making your pins more discoverable by Pinterest's algorithm. This means more exposure for your blog and increased chances of driving traffic.
- Pinterest-happy descriptions: Crafting captivating pin descriptions is a breeze with Tasty Pins. You can write keyword-rich descriptions that not only entice Pinterest users but also boost your search visibility. It's a win-win situation for attracting clicks and driving traffic to your blog.
- Control over pinning: Tasty Pins gives you full control over your pinning strategy. You can designate specific images as “hidden” to prevent them from being pinned, ensuring that only the best, most optimized images represent your blog on Pinterest.
So, if you're serious about harnessing the power of Pinterest’s social media platform to drive Pinterest traffic to your blog, Tasty Pins is your secret weapon.
That’s all for now!
You made it! There’s a lot to learn regarding how to use Pinterest for blogging. I hope these Pinterest and blogging tips come in handy as you step up your Pinterest strategy!
Be sure to check out other blog posts to learn more:
